A lot of business owners assume that figuring out whether their website is ADA compliant requires an expensive legal consultation or a technical audit that costs thousands of dollars. It does not. Most of the issues that end up in demand letters are findable in under an hour if you know where to look. This post walks you through the exact process, step by step, in plain language on how to check if your website is ADA compliant.
What Does ADA Compliant Actually Mean for a Website?
When people talk about ADA compliance for websites, they are almost always talking about WCAG 2.1 Level AA. That is the Web Content Accessibility Guidelines standard, and it is what the DOJ references and what courts have consistently applied in ADA website litigation. It covers 50 specific success criteria organized around four principles: content should be perceivable, operable, understandable, and robust enough to work with assistive technology.
The good news is that the issues that generate the most legal exposure come from a small and predictable set of failures. You do not need to check all 50 criteria to dramatically reduce your risk. You need to check the right ones.
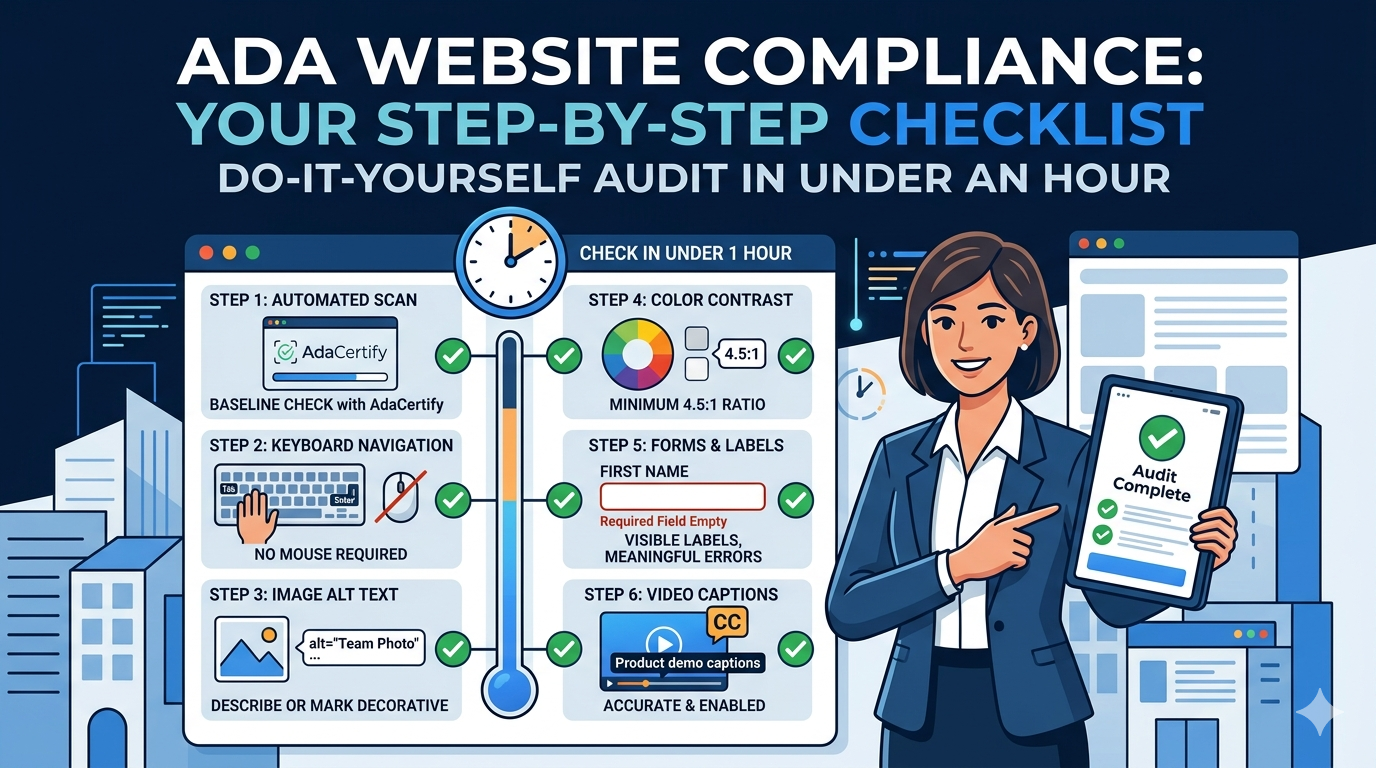
Step 1: Start With an Automated WCAG Scan
Before you do anything else, run your site through an automated accessibility scanner. This gives you a baseline picture of what is failing without you having to check anything manually. Automated scanners test your site’s code against WCAG criteria and flag issues they can detect programmatically.
AdaCertify scans your live website against WCAG 2.1 Level AA and returns a prioritized issue report written in plain language rather than technical jargon. Run it on your homepage, your contact page, your product or pricing pages, and any page that has a form on it. These are the pages that appear most often in ADA complaints.
One important thing to understand: automated scanners catch somewhere between 30 and 40 percent of WCAG issues. The rest require manual testing. This is why the scan is a starting point, not a complete audit.
Step 2: Navigate Your Site Using Only Your Keyboard
Put your mouse aside and try to use your website using only the Tab key, the Enter key, the Space bar, and the arrow keys. This is the test that catches the highest-risk issues.
As you tab through the site, you should be able to see a visible highlight or outline showing you which element currently has focus. You should be able to open every menu and dropdown, fill out every form field, submit forms, and close any popup or modal that appears. If any of those things are impossible without a mouse, you have a keyboard accessibility failure, which is one of the most common grounds for ADA demand letters.
Step 3: Check Your Images for Alt Text
Right-click any image on your site and select Inspect. In the code panel that opens, find the img tag for that image. It should have an alt attribute with a text description inside the quotation marks. An empty alt attribute, written as alt with nothing between the quotes, is acceptable for purely decorative images. But no alt attribute at all is a WCAG failure.
Check every image on your highest-traffic pages: product photos, team headshots, blog post headers, promotional banners. Missing alt text is the single most cited issue in ADA demand letters, and it is also one of the easiest to fix.
Step 4: Check Your Color Contrast
Go to the free WebAIM Contrast Checker at webaim.org and enter the hex color codes for your text and background. For normal body text, you need a contrast ratio of at least 4.5 to 1. For large text that is 18 points or larger, the minimum is 3 to 1.
If your site uses light gray text on a white background, brand-colored text on light backgrounds, or text placed directly over photos without a dark overlay, there is a strong chance you are failing this. WCAG 1.4.3 contrast failures are extremely common and frequently cited in ADA complaints.
Step 5: Test Your Forms
Go to your contact form, your signup form, or your checkout page. Check whether every input field has a visible label that stays visible when you start typing. Placeholder text that disappears when you click into the field does not count as a label under WCAG. Check whether required fields are clearly marked with more than just a red border. And try to complete the entire form using only your keyboard.
Also check what happens when you make an error. Submit the form with a required field left blank and see what the error message says. A message that just turns a border red without explaining what went wrong fails WCAG 3.3.1.
Step 6: Check Your Videos
Any video on your site that includes speech or meaningful audio needs captions. This applies to embedded YouTube videos (where you should verify that captions are enabled and accurate, not just auto-generated), Vimeo embeds, and any video you have hosted directly on your site. Recorded webinars, product demos, and customer testimonials without captions are WCAG failures that show up regularly in ADA complaints against media-rich business websites.
What Do You Do With What You Find?
Sort your issues by legal exposure. Missing alt text, unlabeled forms, and keyboard navigation failures are the three areas that generate the most demand letters, so fix those first regardless of what else the audit surfaces.
If your scan through AdaCertify comes back with a long list, do not get overwhelmed. Work through it by page priority, starting with your homepage and the pages where users take action. A form that users cannot fill out with a keyboard is a much higher priority than a decorative image missing an empty alt attribute.
As you make fixes, keep a simple record of what you changed and when. If a complaint is ever filed against you, documentation of good-faith remediation efforts is useful context.